
Spendesk supports a native integration with Sage 100, allowing you to seamlessly export your payables and synchronize your accounting data.
To access this integration with Sage 100, you need us to grant you access beforehand. Please contact your Customer Success Manager or Account Manager.
This connection process applies if your Sage 100 solution is hosted on-premise, meaning on your own servers. If you host Sage 100 on an Azure server, please refer to this specific article to connect Spendesk to Sage 100 cloud SPC (Sage Partner Cloud).
Prerequisites:
You must be an Administrator in Sage 100 on-premise.
You must be assisted by your Sage 100 integrator.
You must be an Account Owner or Controller in Spendesk.
Your version of Sage 100 must be at least version 7 or later.
Verify that the .NET framework 4.8 is installed on the server prior to installation.
Sage 100 operates with Business Objects, and the versions of Sage 100 and the Sage Business Objects must match.
You have a Windows user who has read and write access to the SQL database of the accounting file and to the Sage 100 file.
Connection steps
Once you have the feature granted by Spendesk, you can proceed with the initial configuration and installation on Sage 100, and then switch integration on your Spendesk account.
Step 1 - Preparation prior to connection on Sage 100
Step 1 - Preparation prior to connection on Sage 100
This installation requires the assistance of your Sage integrator. Make sure you have read our article on the prerequisites to set up the integration with Sage 100 on-premise or Sage 100 cloud. First of all, check your Sage version:
From your account in the menu bar > '?' > 'About Sage 100 Accounting ...'
On the page that opens, you will find at the top of the page the number of your Sage versions.


Now you can start establishing the connection. Please follow the 5 steps to retrieve some key information.
1. Find your file / company code
This information is visible from your Sage 100 instance at the very top of your page in a menu bar. In the center of this 'menu' banner you will see the company code, which is the name of the folder, for instance in this example 'BIJOU'.

2. Retrieve the number of the analytical zone / plan
To identify the analytical zone / plan number, you need to follow these steps from your Sage 100 instance. Go to Structure > Cost charts:
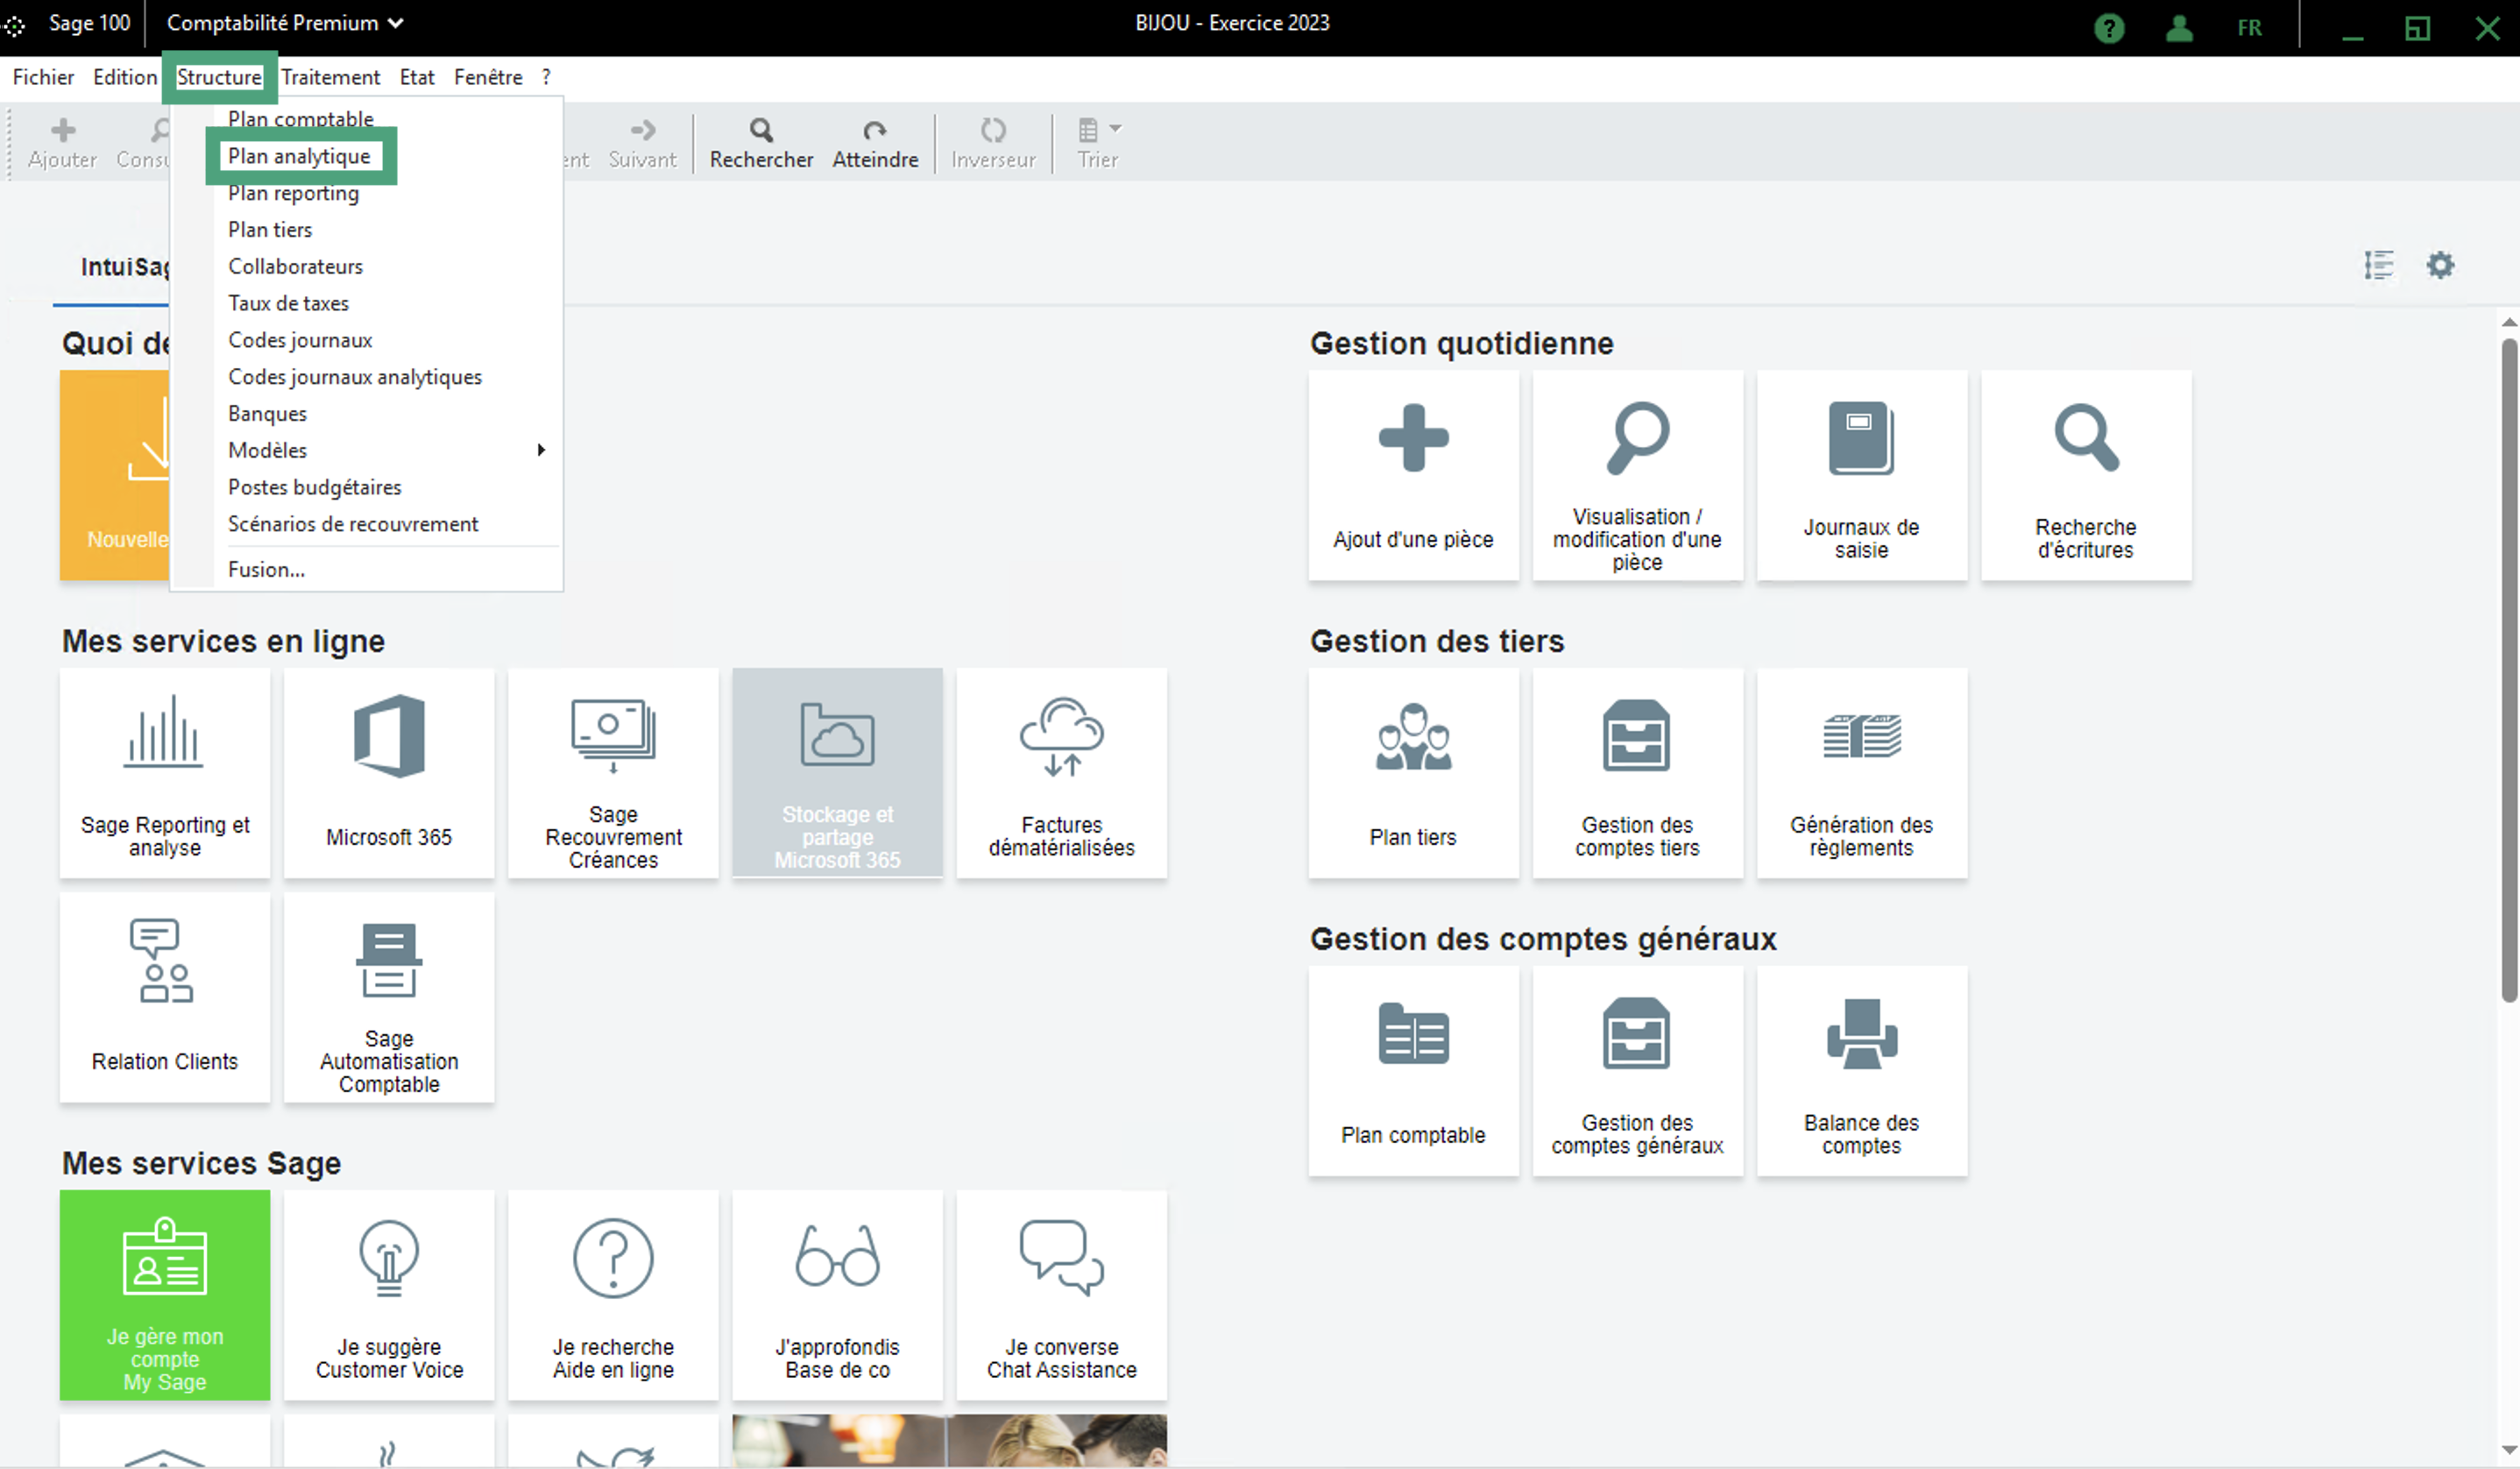
You need to choose the analytical plan to connect. The identifier is simply the number of the analytical plan in the list if you were to count them one by one. In the example account below we have 4 possible analytical plans:
'Activité' = '1' (fill in the number '1' to select the first analytical plan)
'Produits et services' = '2' (fill in the number '2' to select the second analytical plan)
and so on for other analytical plans

3. Retrieve the location of the accounting file (.mae)
From your Sage 100 instance, go to 'Files' → 'System Configuration and Sharing'. Then, as shown in the screenshot below, select 'accounting file' and copy the name of the Sage 100 data folder location and keep it to fill it later in the connection form. Make sure that the access type is set to 'multi-user'.

4. Retrieve your username and password
The Sage 100 user name can be retrieved as follows: on your Sage 100 account go to 'File'→ 'System configuration and sharing'. If you use the 'Administrator' user, fill in "Administrator" with the '>'.
The password of the Sage user is that of the user above. It is possible that the user mentioned does not have a password. In this case, leave this field blank.


5. Retrieve your SQL Server username and password
To find this information, you must contact your Sage 100 integrator and ask them to provide you with the following information:
Sage 100 SQL server username
Sage 100 SQL server password
Step 2 - Select integration on Spendesk
Step 2 - Select integration on Spendesk
Go to Spendesk and navigate to Settings > Accounting Setup and click Switch Integration.
Choose Sage 100 in the dropdown.
Read through an explanation of what switching an accounting integration means, the requirement of having a Sage 100 integrator, and click Continue.
Click Switch Integration.

Step 3 - Connect Spendesk to Sage 100
Step 3 - Connect Spendesk to Sage 100
Follow the next steps to switch the integration and be aware of the impacts as we will import your chart of accounts from Sage 100, and click on Continue.

Then click on Build connection.

You now start the connection flow. You need to choose Private server and your storage type for your supported evidence from Spendesk as PDF documents:
Select Yes to store PDFs as filestreams within Sage (accessible from the invoice).
Select No to store PDFs in a server folder.
Then fill the other fields specific to your Sage 100 instance and click on Connect:SQL server name
SQL database name
Sage 100 username
SQL server username
SQL server password
Sage 100 data folder path

This integration requires the installation of a local agent on your server. You can either download it or receive it by email.
If you have admin access to the server/computer where your software is installed, you can directly download the program by clicking on Download.
If your software is installed on a server/computer where you don’t have admin access, you can send the program via email to the person or company with admin access to the server/computer where your software is installed, by clicking on Send by e-mail.

You should have received the file, and be redirected back to the Accounting Setup page on Spendesk where you will see the status of your connection. At this stage, the connection is inactive, this is why the message indicates 'Server not responding'.

Step 4 - Installation of the local agent on Sage 100
Step 4 - Installation of the local agent on Sage 100
Network prerequisites:
The local agent must communicate with several network resources to function properly. Make sure that your local firewall rules, routes, and access control lists (ACLs) allow traffic on these three:
s3.eu-west-3.amazonaws.com (port 80 and 443)
sqs.eu-west-3.amazonaws.com (port 80 and 443)
api.chift.eu (port 80 and 443)
Test your network connection by running commands like telnet
➜ ~ telnet s3.eu-west-3.amazonaws.com 443 Trying 3.5.206.184... Connected to s3.eu-west-3.amazonaws.com. Escape character is '^]'.
Required libraries:
The .NET Framework 4.8 MUST be installed on the server/computer where the local agent will be installed. It can be downloaded from the Microsoft official website.
You can now install the agent on the server where your Sage 100 instance is running, and simply follow the below steps until completed installation.
Installation process:
We recommend you to perform the installation directly on the server running your Sage 100 instance.
Once you have filled out the form and downloaded the zip archive, start by copying the archive to the server where Sage 100 is installed.
All following steps assume that you are connected to the server and that all prerequisites have been verified. If you have any doubts, stop here and make sure the requirements are met before proceeding.
Start by extracting the contents of Setup.zip.

Inside, you will find:
settings.json– this is a configuration file (do not open or edit).A set of executable files to install the Windows service.
Important: do not move any files out of this folder. Everything is designed to work directly from the downloaded location to simplify the installation process. Also, please do not try to edit the JSON file as it can easily corrupt the file.
Start the executable that matches your Sage version. For example, on our server running Sage 11.02, we use the v11.0 installer.

The first screen asks you to select the installation language. Choose the one you are most comfortable with.

On the next screen, the installer will ask for the configuration file we mentioned earlier. The good news is that it’s automatically detected in the same folder as the installer, so you don’t need to select it manually.

Confirm your Sage version. Make sure Sage 100 on-premise is selected.

Next, you will set up the connections for your Sage instance. All connections currently available on the server will be listed.
For each connection, you will see its name (for example, Demo Sage / MyAccountingFolder). This name matches the connection name you entered on the form earlier and identifies the corresponding Sage folder.

For each connection, you will need to use the browse button to go and select the MAE file associated to that folder on Sage.
Once you selected the MAE file, a new pop up will open to ask for the Sage user to use to interact with Sage. We highly recommend the use of the default <Administrator> user.

Click Confirm to finalize the credentials setup for this folder. If you have multiple connections to connect, fill those informations for all accounting folders to connect to make sure all folders are properly configured. Once all folders are configured, click Confirm at the bottom right to proceed.

Click on Next to validate all the information you’ve entered. The installer will now check access to each accounting folder configured in the previous step to ensure everything is set up correctly. If any credentials are not recognized by Sage, click on Select MAE files to go back and update them before continuing.
In the following step, you need to choose the Windows user account that will run the service. This account is also used to enable remote updates of the service, so future improvements can be deployed automatically without manual intervention.
If your Sage files are stored on a network drive, this step is mandatory - without it, the agent won’t be able to function properly.

Click on Next to finalize the installation of the agent.

Click on Install to start the installation.

If a screen appears indicating that a previous version of the installer exists, it simply means the service will be stopped and updated. Click Next to continue.

Once the installation is complete, click Finish. Everything should be setup properly.

Step 5 - Activate the connection on Spendesk
Step 5 - Activate the connection on Spendesk
Now you should be ready to connect on Spendesk and pull your master data from Sage 100. Go to your Accounting Setup in Spendesk and click on Refresh accounting settings. This will pull your master data from Sage 100.
Important notes:
If you go to Accounting Setup in Spendesk and click on Refresh accounting settings, this will pull your master data from Sage 100.
If you want to add multiple entities for this integration, you can either do the install process of the local agent for each entity, or merge JSON files into one JSON file (real merge, not text copy paste). This would enable to connect all entities at once.
If you have disconnection issues, you can read this dedicated article that will provide you some options to reconnect to your server.
Do not switch integration on Spendesk while being in the installation process on your Sage servers, else this will delete your connection.
Next steps
You can now start the configuration of Spendesk to use Sage 100 accounting setup.